Netsplit: An Excruciatingly Detailed Portrait of a Fairyweight
Netsplit is my 150g Fairyweight combat robot. It's the first combat robot of my own design. The first version debuted at Smashbotz LA in October 2021 where it took first place. I've taken it to four other competitions where it's been lots of fun but hasn't won quite as much.
Be forewarned, I'm a software "engineer" and have no experience in real engineering. What I know about combat robot design was mostly learned from trial and error. I apologize if I misuse any engineering terms or am flat out wrong about things.
Each competition I bring a slightly different Netsplit with changes that I hope will address issues seen at the last competition. Every component of the current Netsplit, down to the wire I use, has been upgraded or changed based on things I've learned at competitions.
Design Philosophy
I have three major design objectives with Netsplit. These inform how I consider changes or upgrades I might make. They're intentionally not prioritized, I think of them as an iron triangle; the more I put into one category the more the other two suffer.
Destructive: Netsplit is designed to hit hard and go home early. I would rather have two exciting losses than 10 boring wins. I have the biggest weapon I can control, and just enough of everything else to ensure I can deliver that weapon and survive what happens next.
Cheap: I use low cost easily available components and try to use them in a way that keeps them safe for reuse. Any time a failure mode is impossible to prevent, I try to make it less expensive, which means intentionally designing some (usually 3d printed) parts to fail in order to preserve more expensive parts like motors.
Disposable: I consider the entire exterior of the robot to be ablative. Anything an opponents' weapon can touch, that isn't my weapon, should be able to come off in chunks without affecting performance.
With that in mind, lets get into the parts that make up a Netsplit.
The Chassis
I figure we might start at the largest part. The chassis has gone through more iterations than any other component, I had printed a dozen different versions before my first competition, and it's not uncommon for me to show up at a meet with three or four versions of a chassis to test and compare.
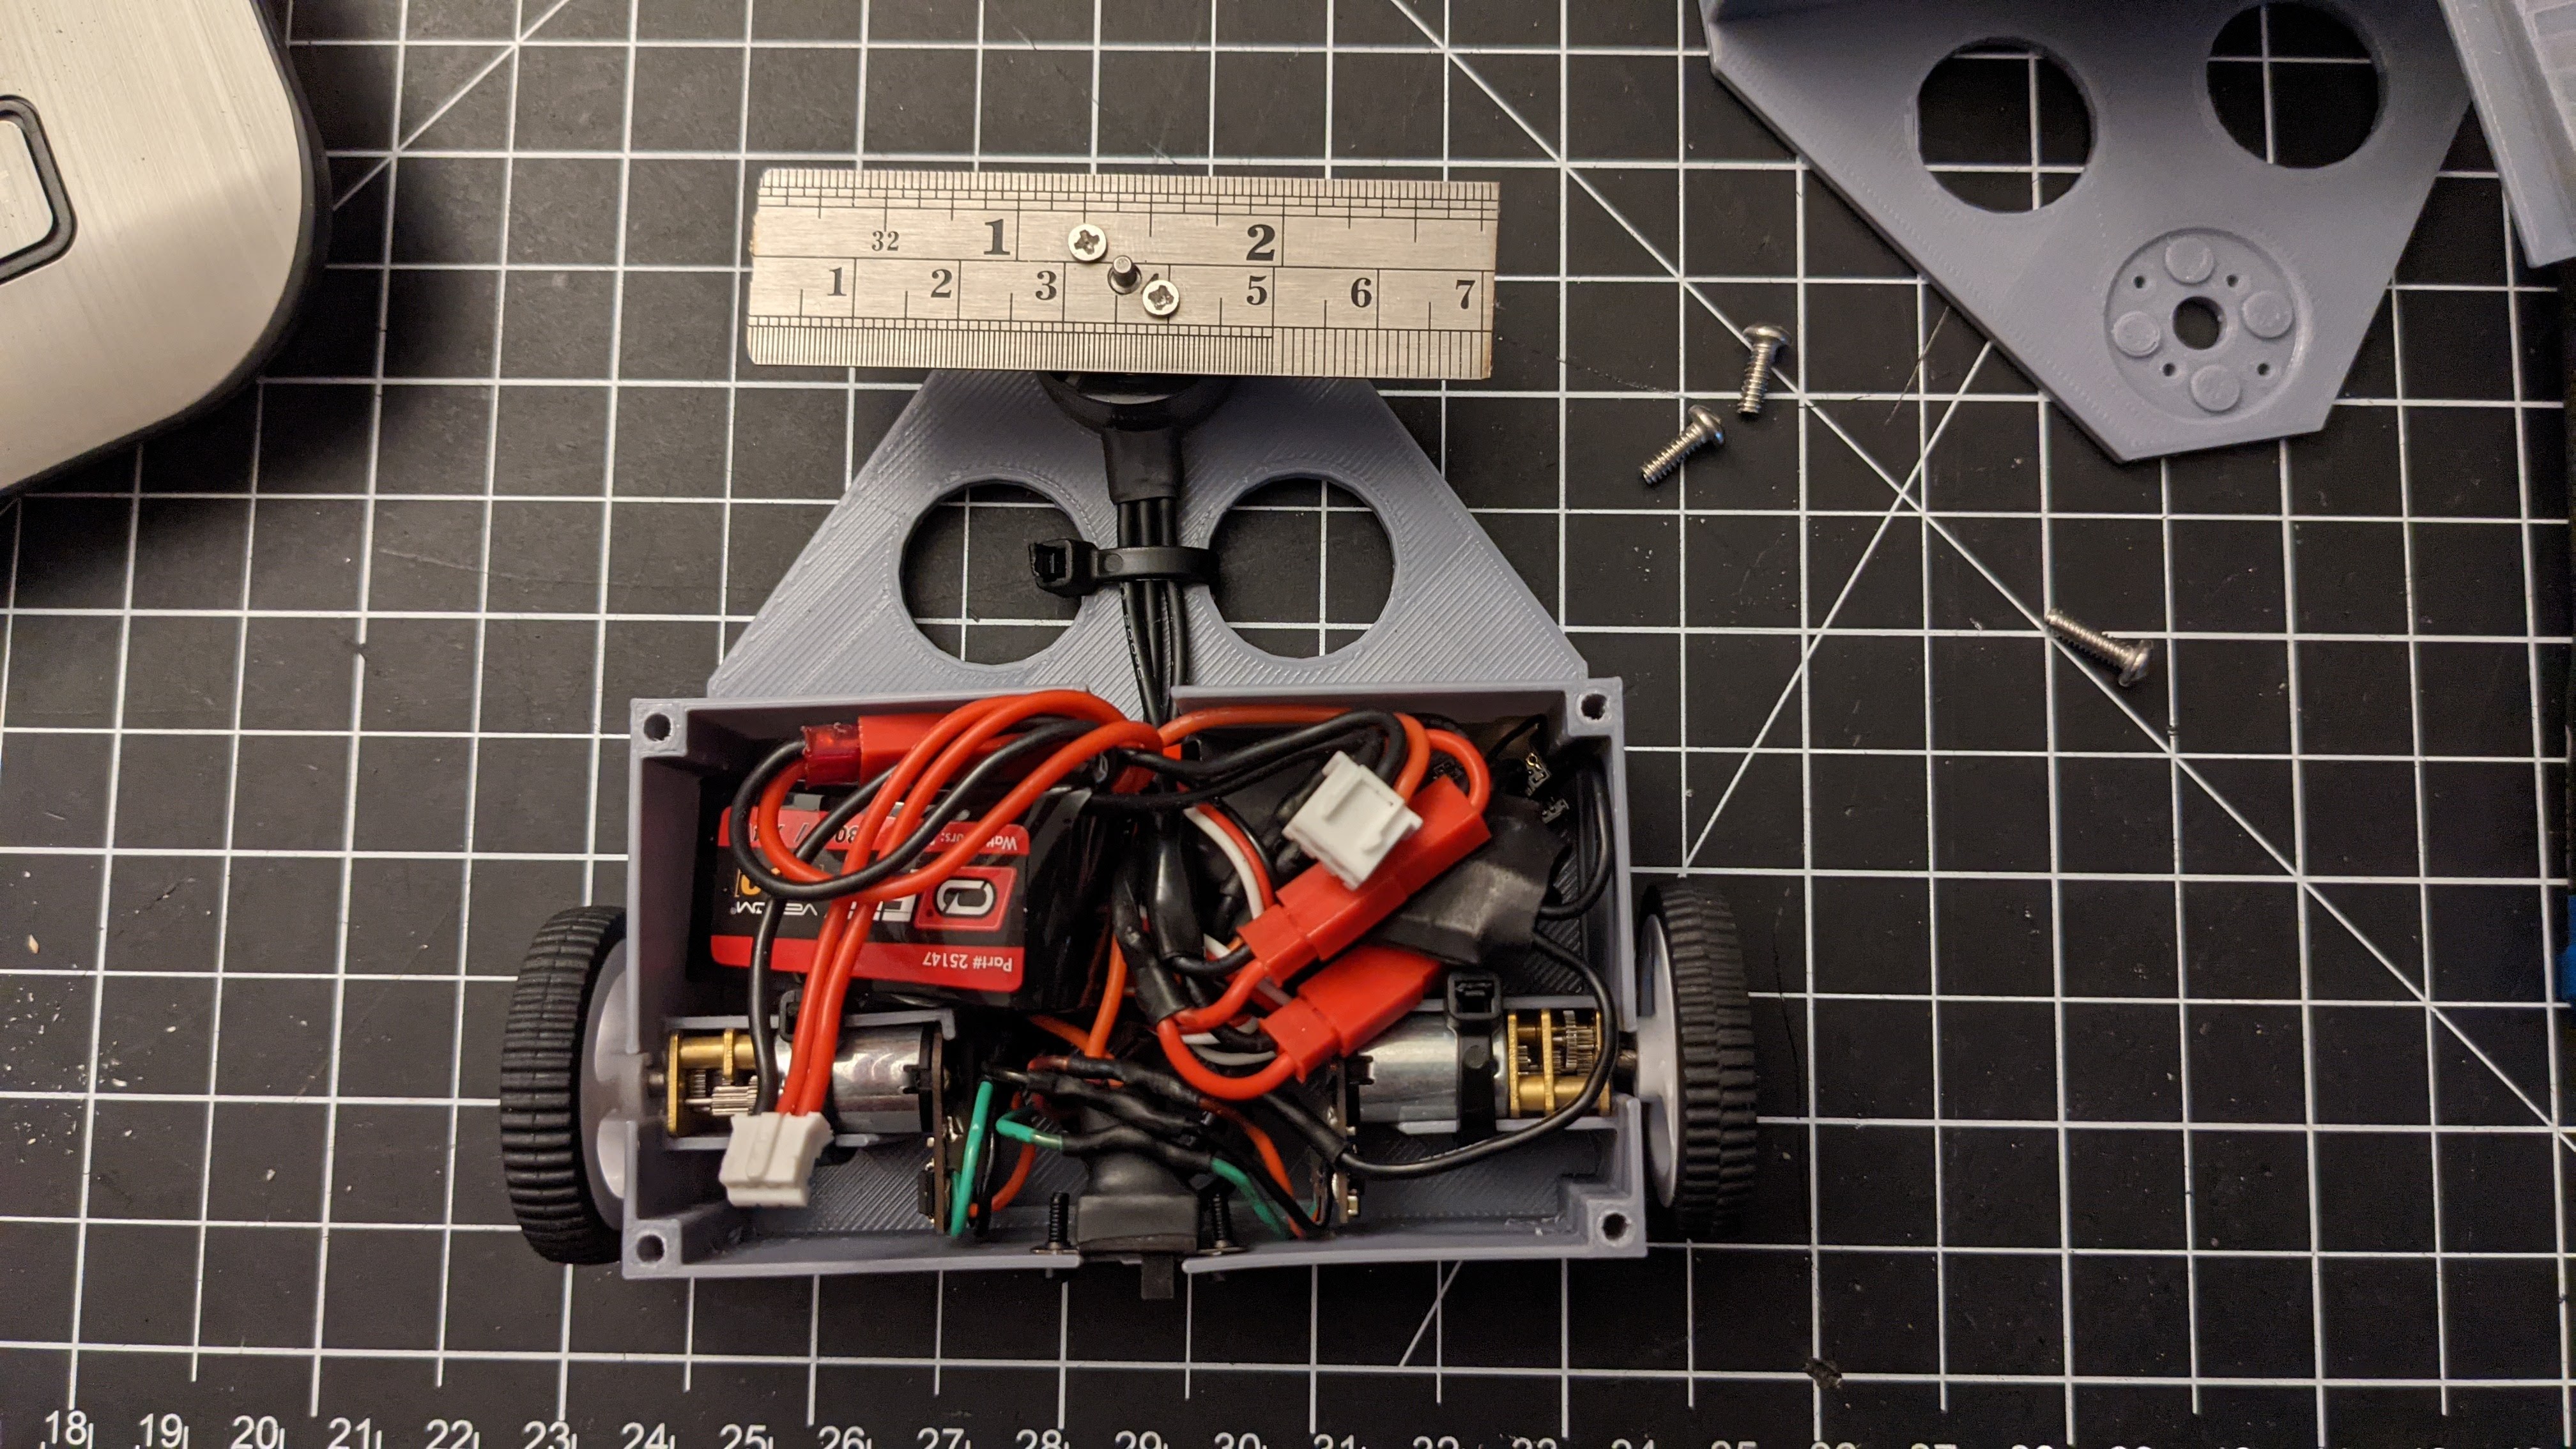
The chassis has always been printed in SUNLU PLA Plus white, which in my testing seemed strongest out of white, black, and grey. Many early prototypes were printed in grey as that's what I had around, but I don't think I've run any visible grey parts in competition. Since the chassis design is in a state where I don't want to change it much, I've been looking into getting it printed in Nylon, but haven't yet found a service I'm happy with. I print at .3mm layers with 3 walls and 20% infill, though there's only one spot with infill.
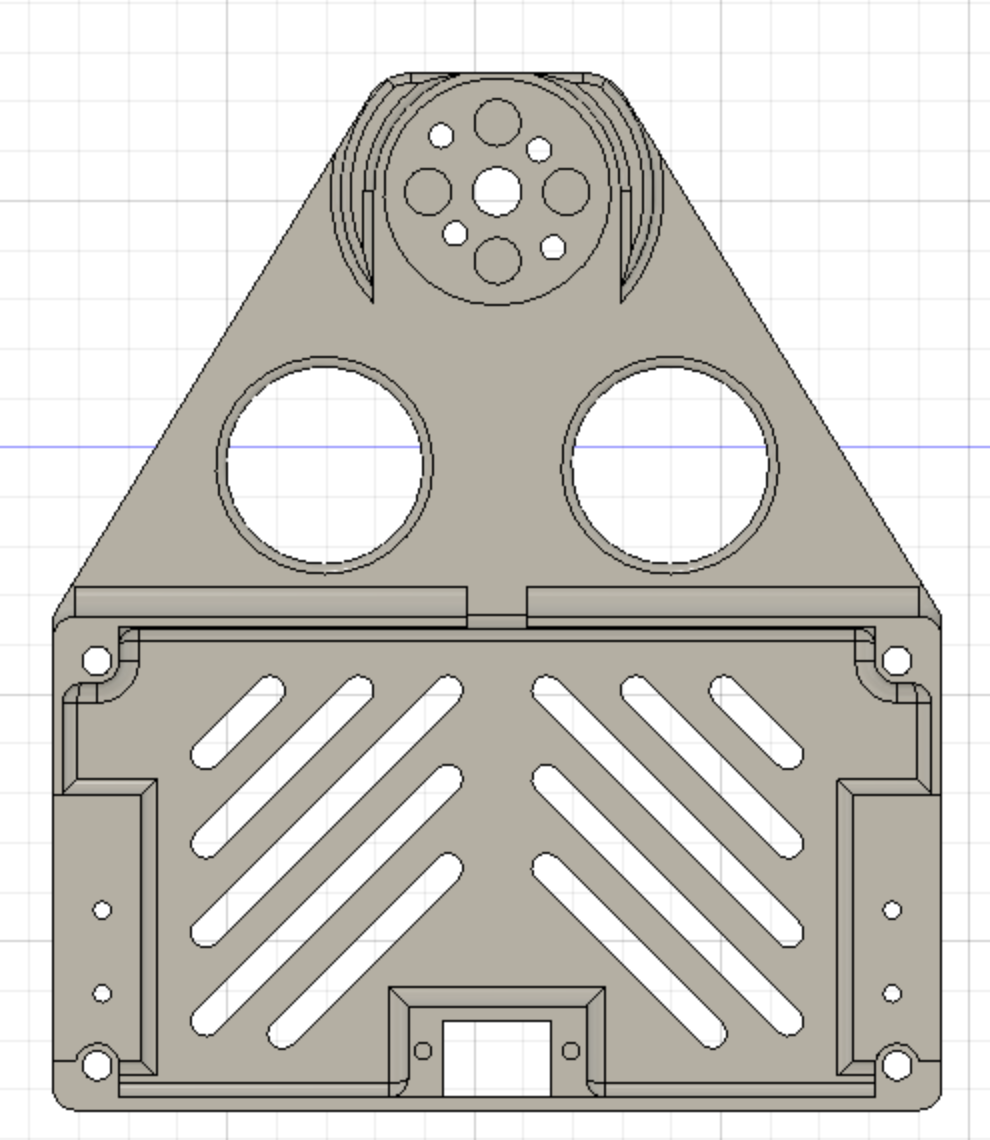
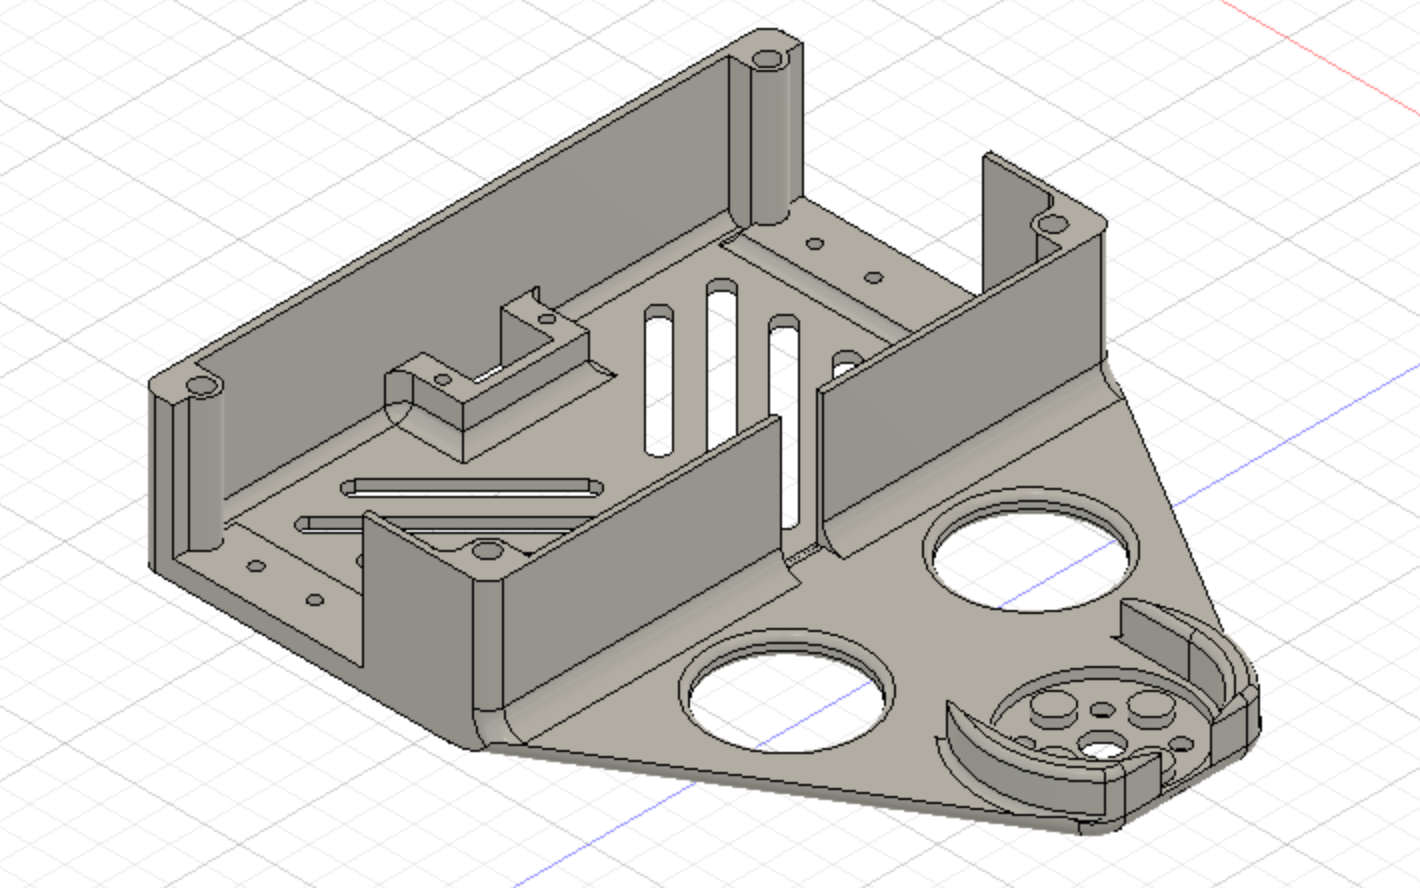
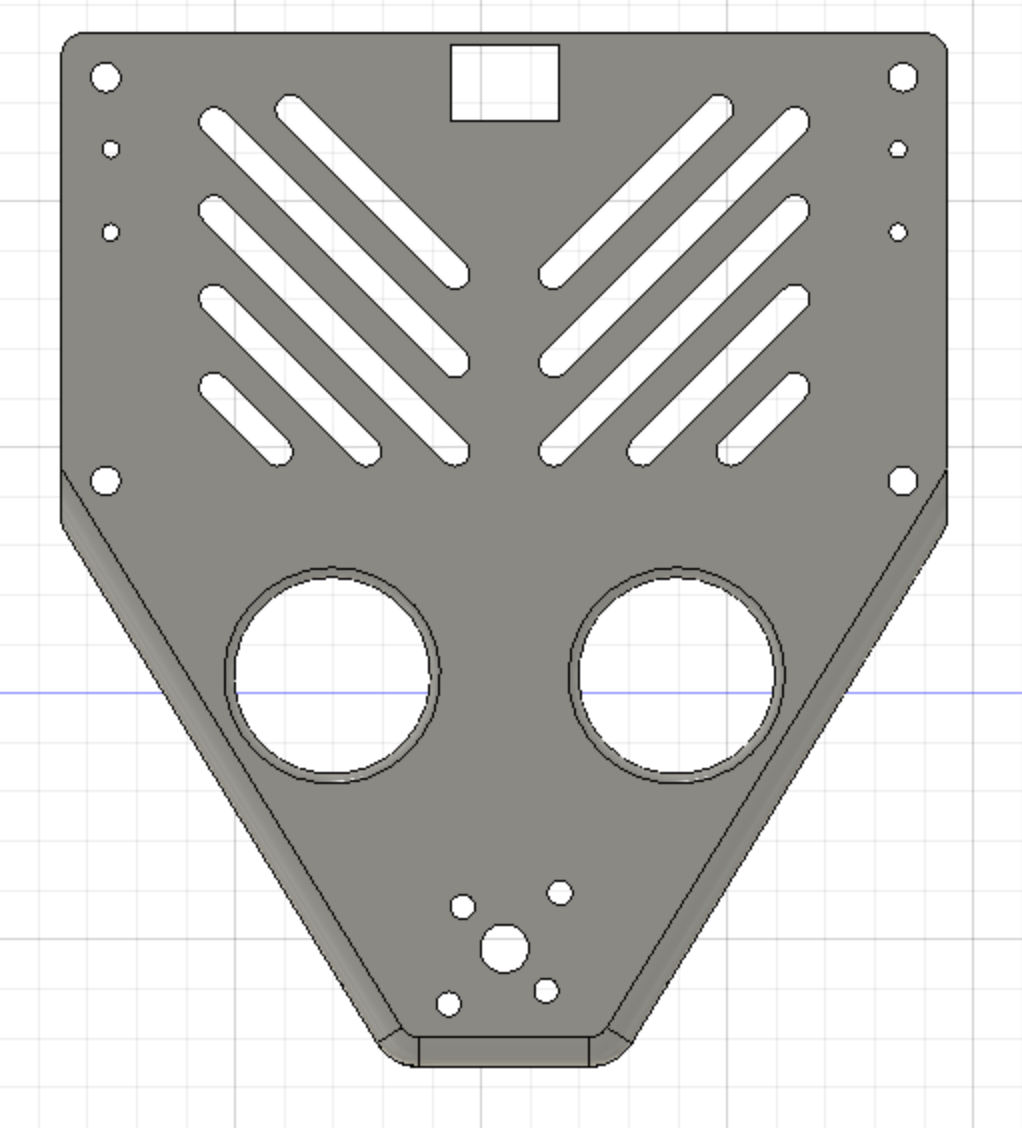
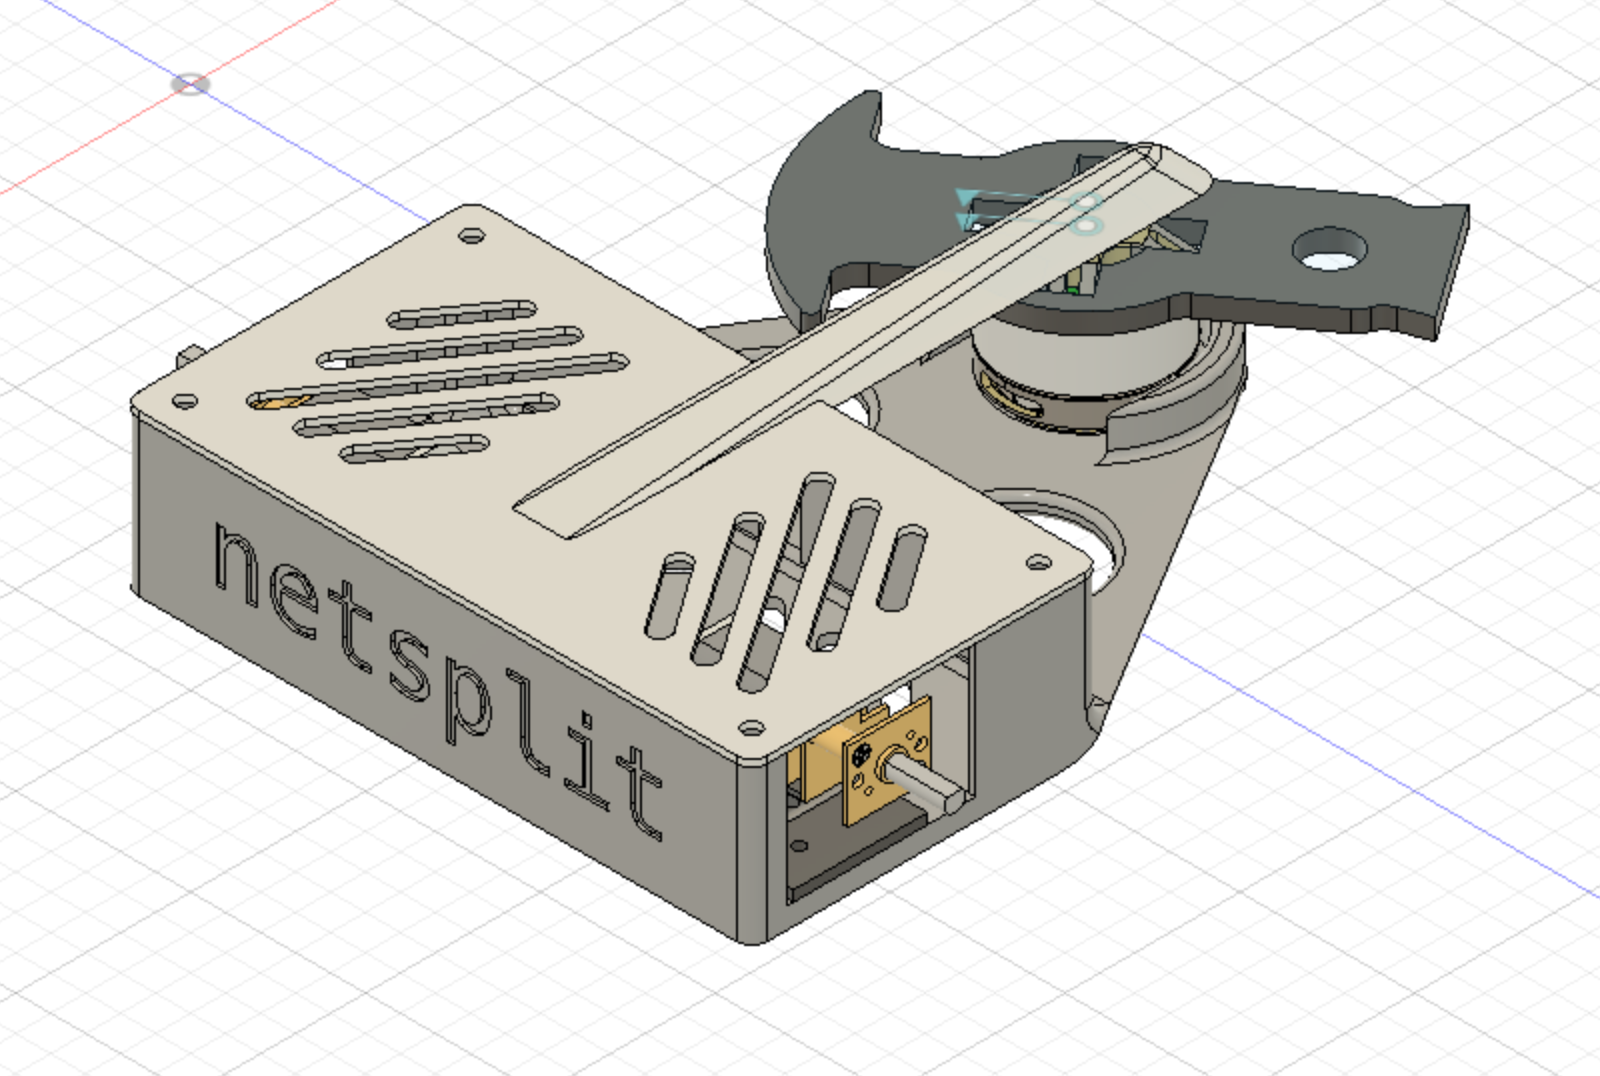
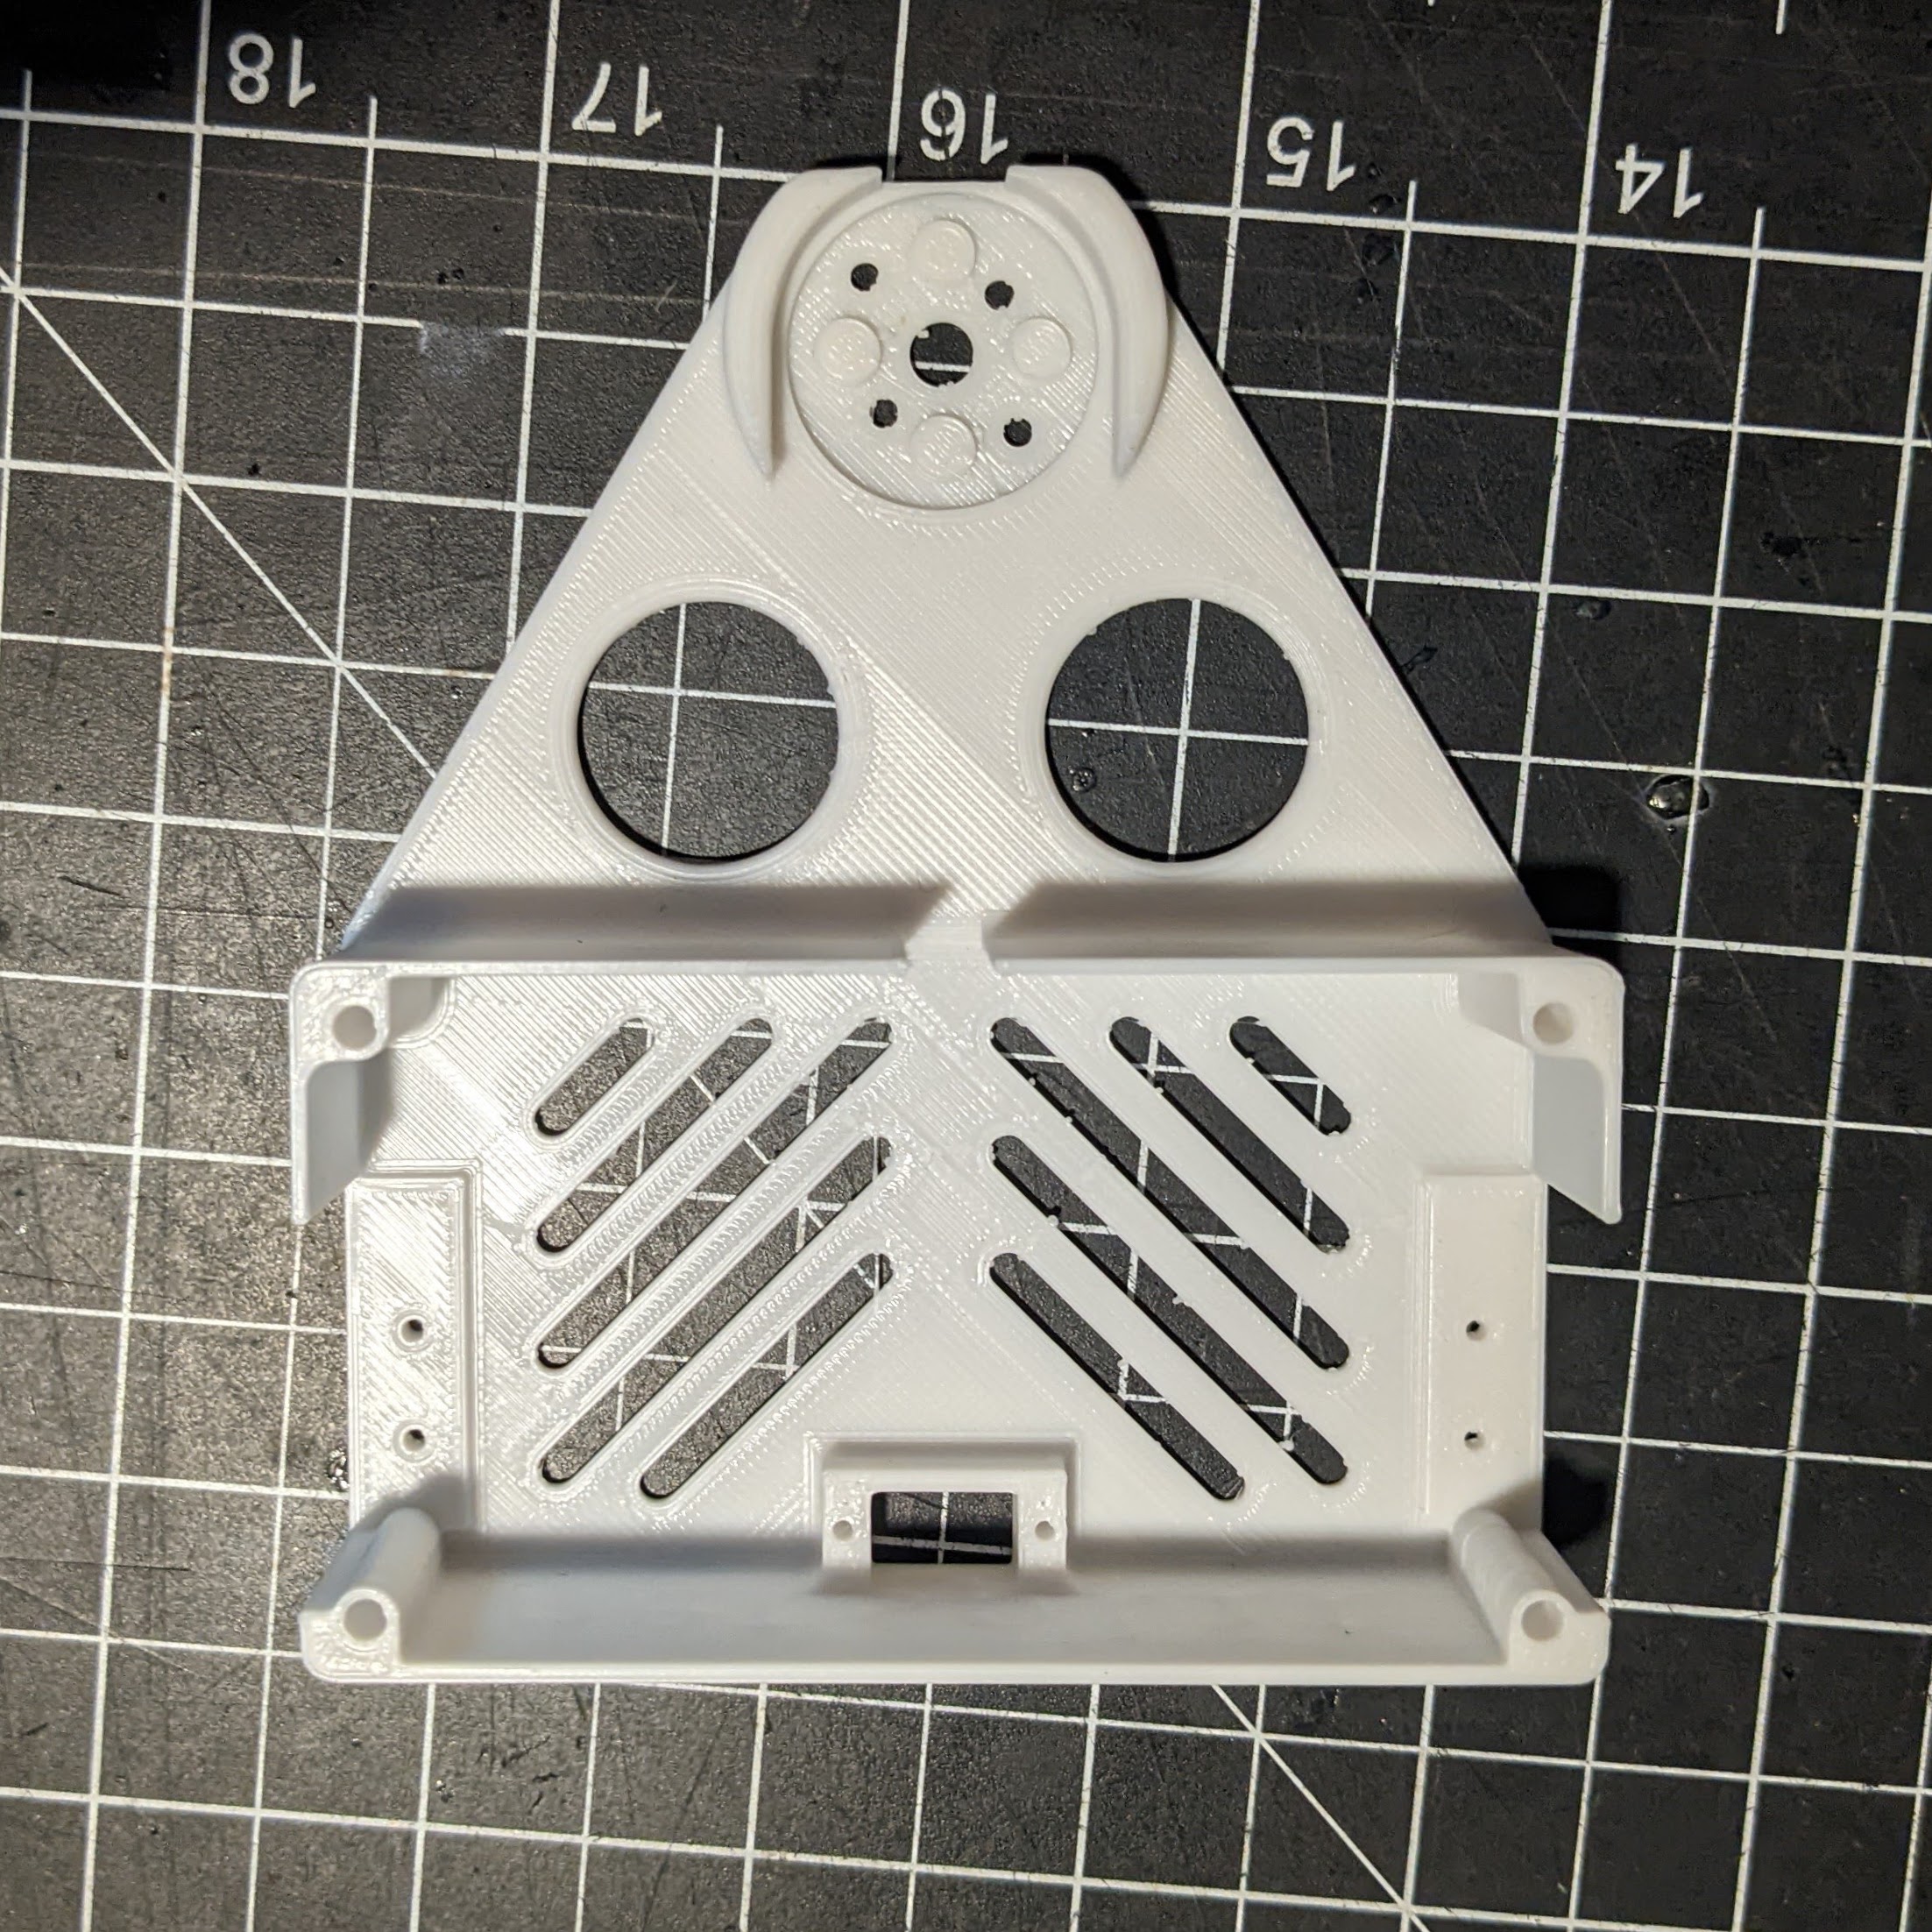
The perimeter walls of the electronics compartment are 1.25mm thick and 22mm tall, the floor is 1.5mm. The vents aren't for ventilation, but allow me to cut a few grams from the chassis without affecting its strength.
Early iterations of the chassis would flex under impacts and cause the walls to detach along layer lines and buckle. Initially I wanted to beef up those walls, but following my principle of disposability, I made them thinner and discontinuous. The large gaps around the wheel mounts and the slot in the front allow the chassis to bend and twist a surprising amount before failure. This allowed the chassis to deliver and sustain much harder hits while becoming lighter, double win!
Naturally, all the joints where the walls meet the floor are filleted. Hard corners are stress risers.
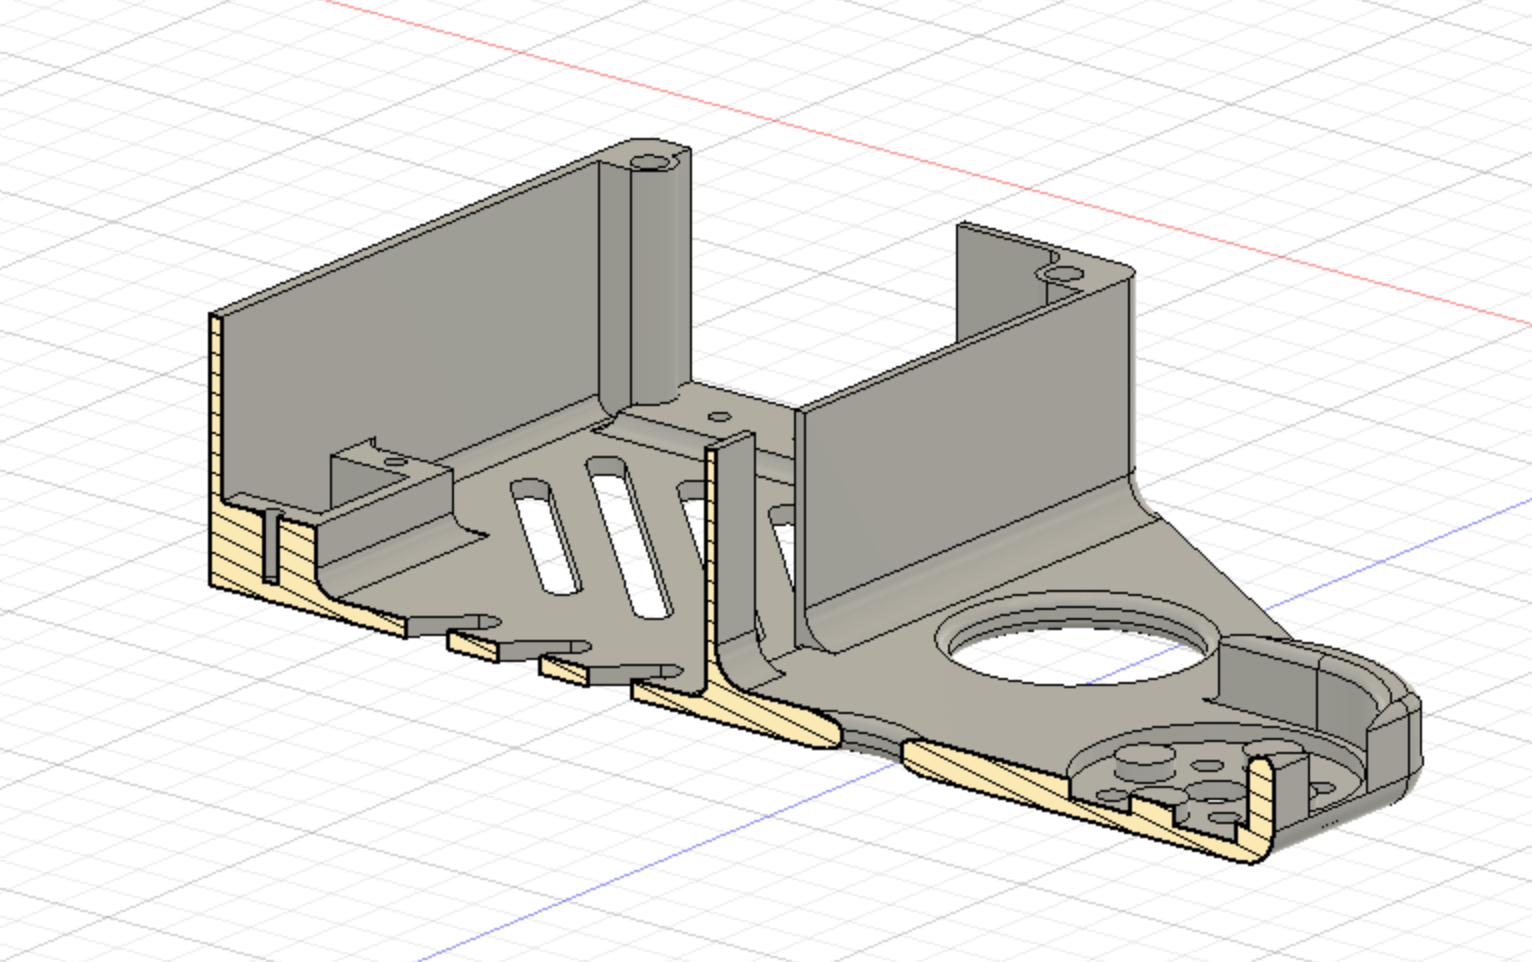
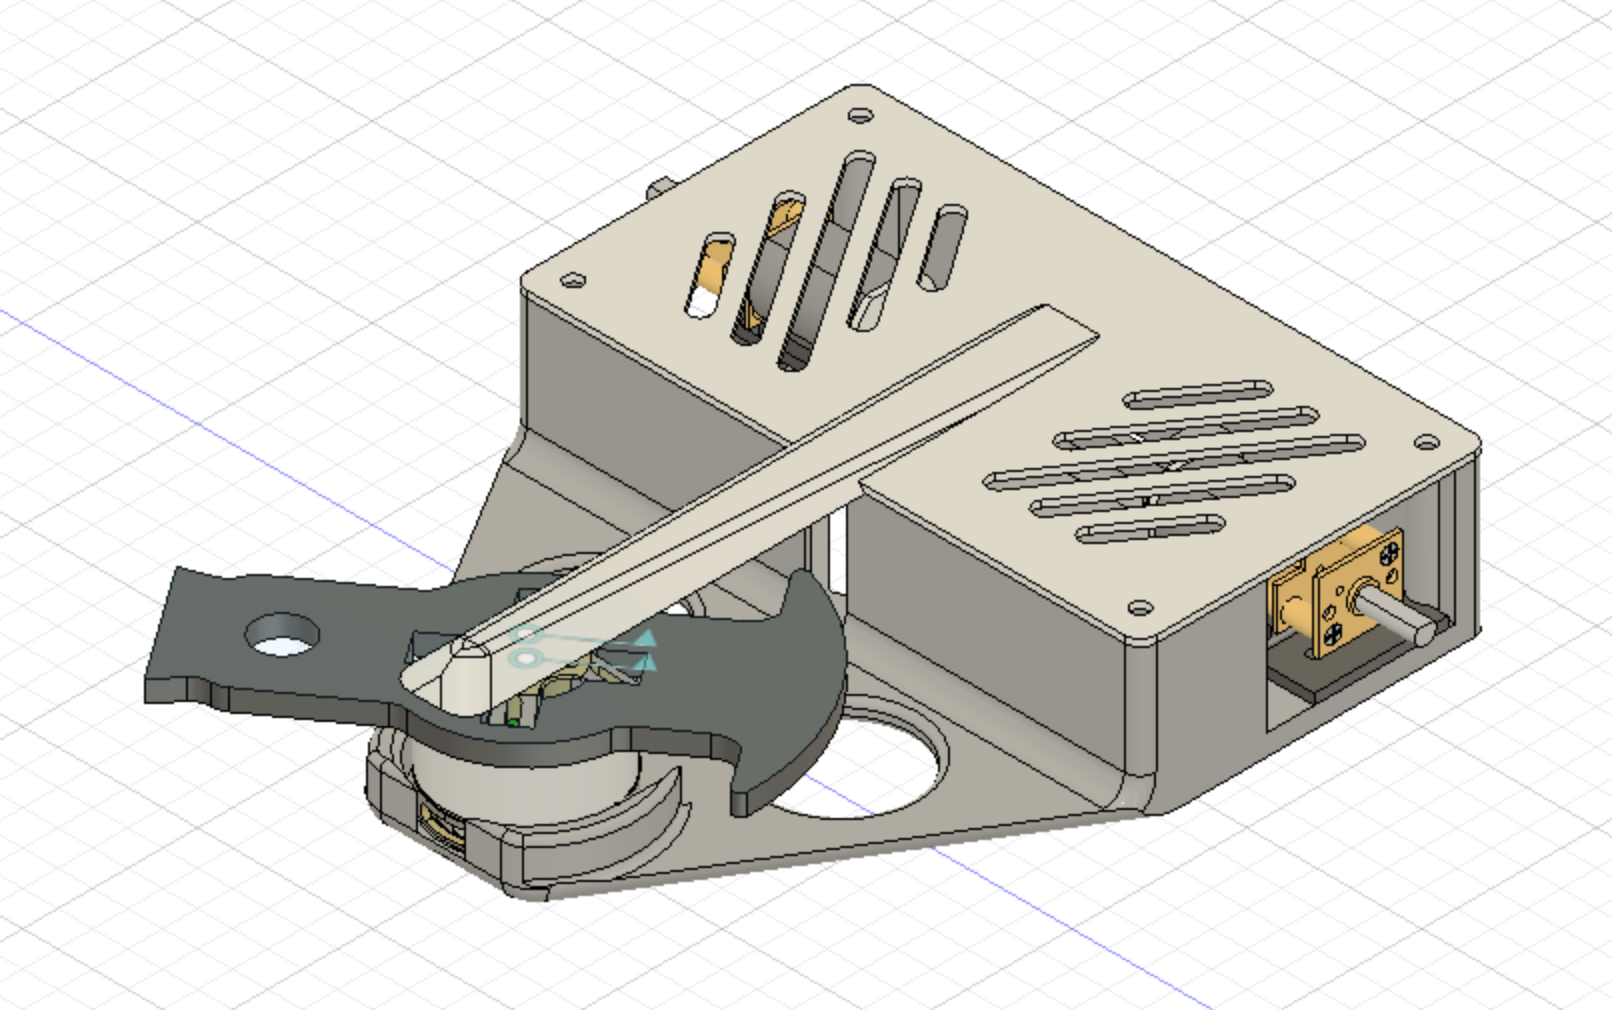
What I affectionately call the "weapon tongue" (because it looks like a trailer tongue) increases in thickness to 3mm. This is the only part of the chassis with any infill and it's mostly hollow. When I printed it solid, vertical impacts on the tongue would result in cracks and rapid failure, but as a hollow part it's able to crush and deform in a way that doesn't propagate through the rest of the part.
The holes in the tongue also isolate cracks that might form, effectively turning one component into 3 redundant arms. I've had both sides of the triangle fully broken but the center intact and capable of delivering hits.
The tongue is a flat triangle on the weapon's impact axis so that it's strong when delivering impacts but is able to flex and absorb impacts from other directions. That's the theory anyway, but the weapon bar is on the top of the motor, so it actually gets a fair amount of twisting force. So far that hasn't been a problem, but if I switch to Nylon it might flex a bit too much.
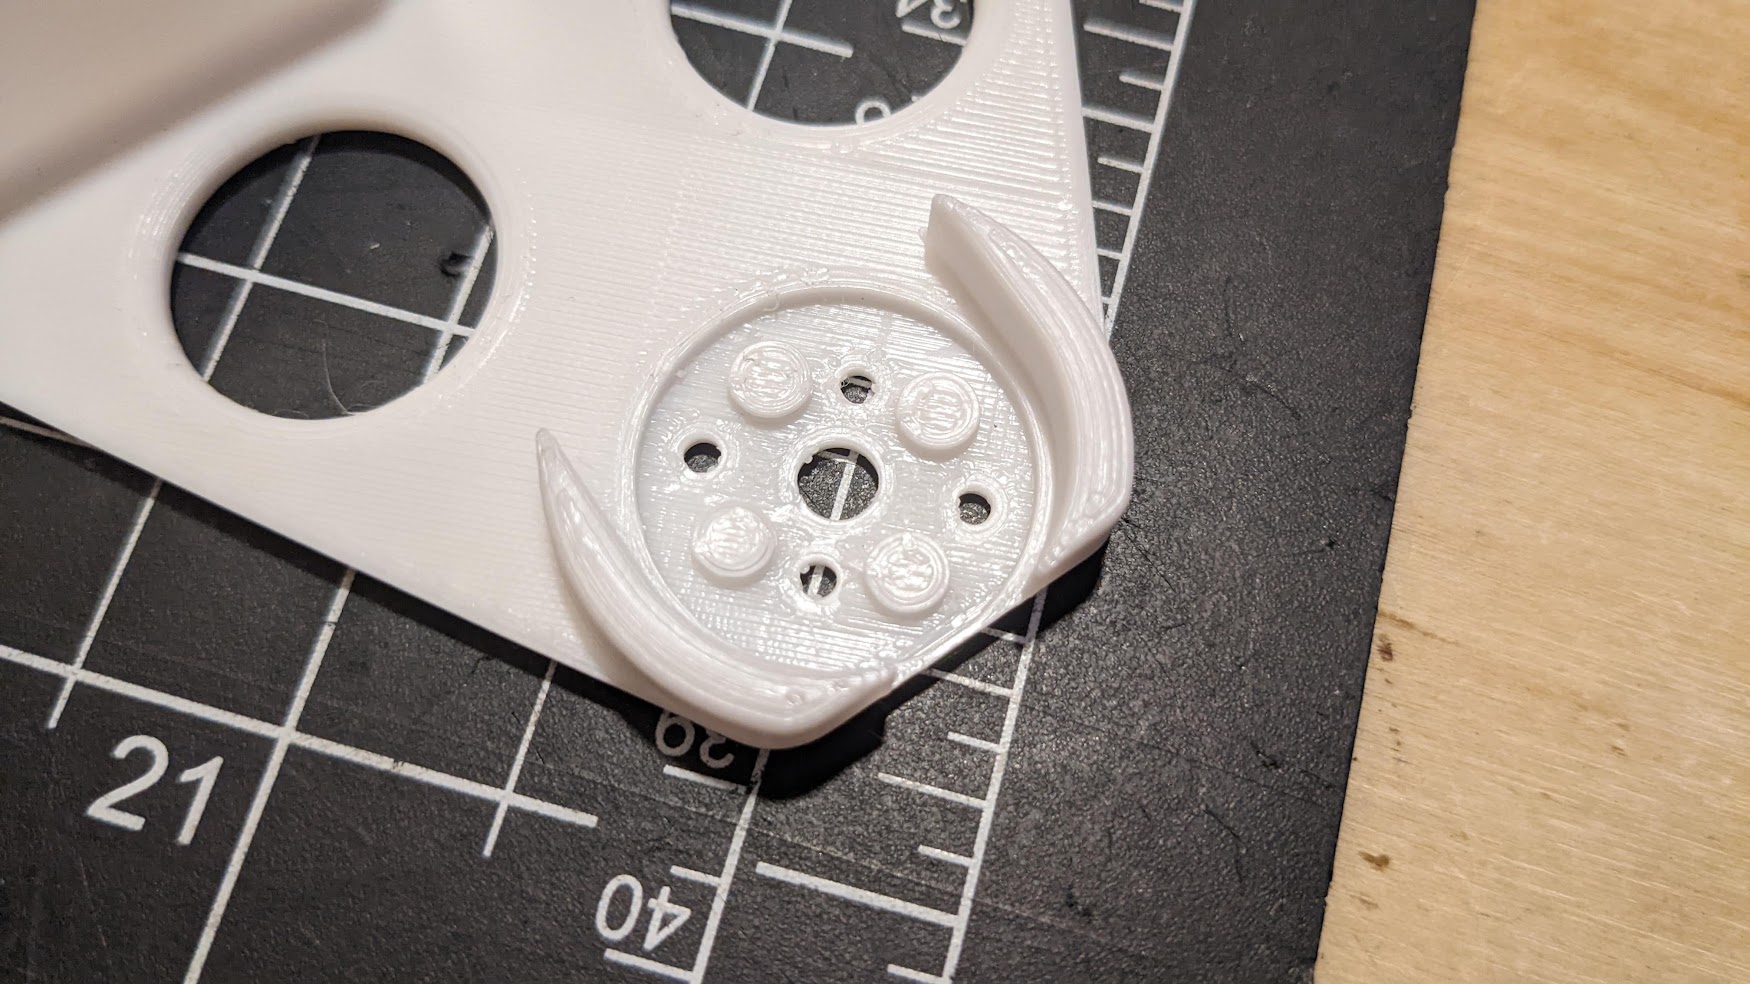
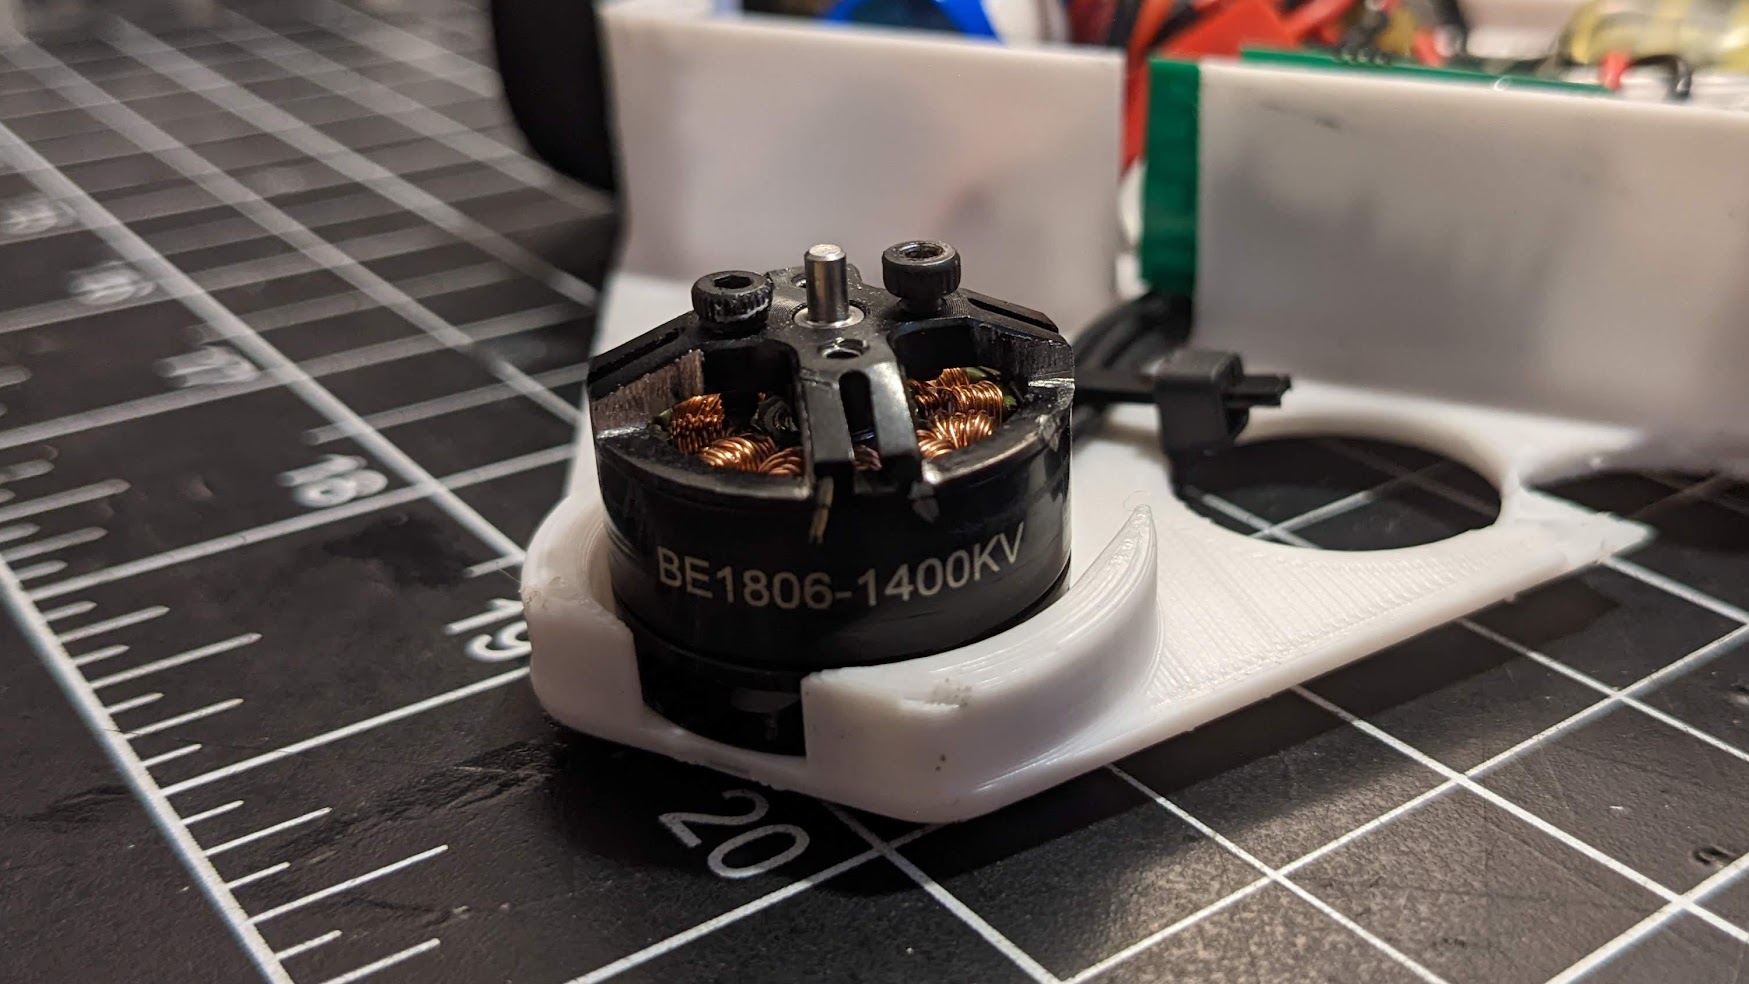
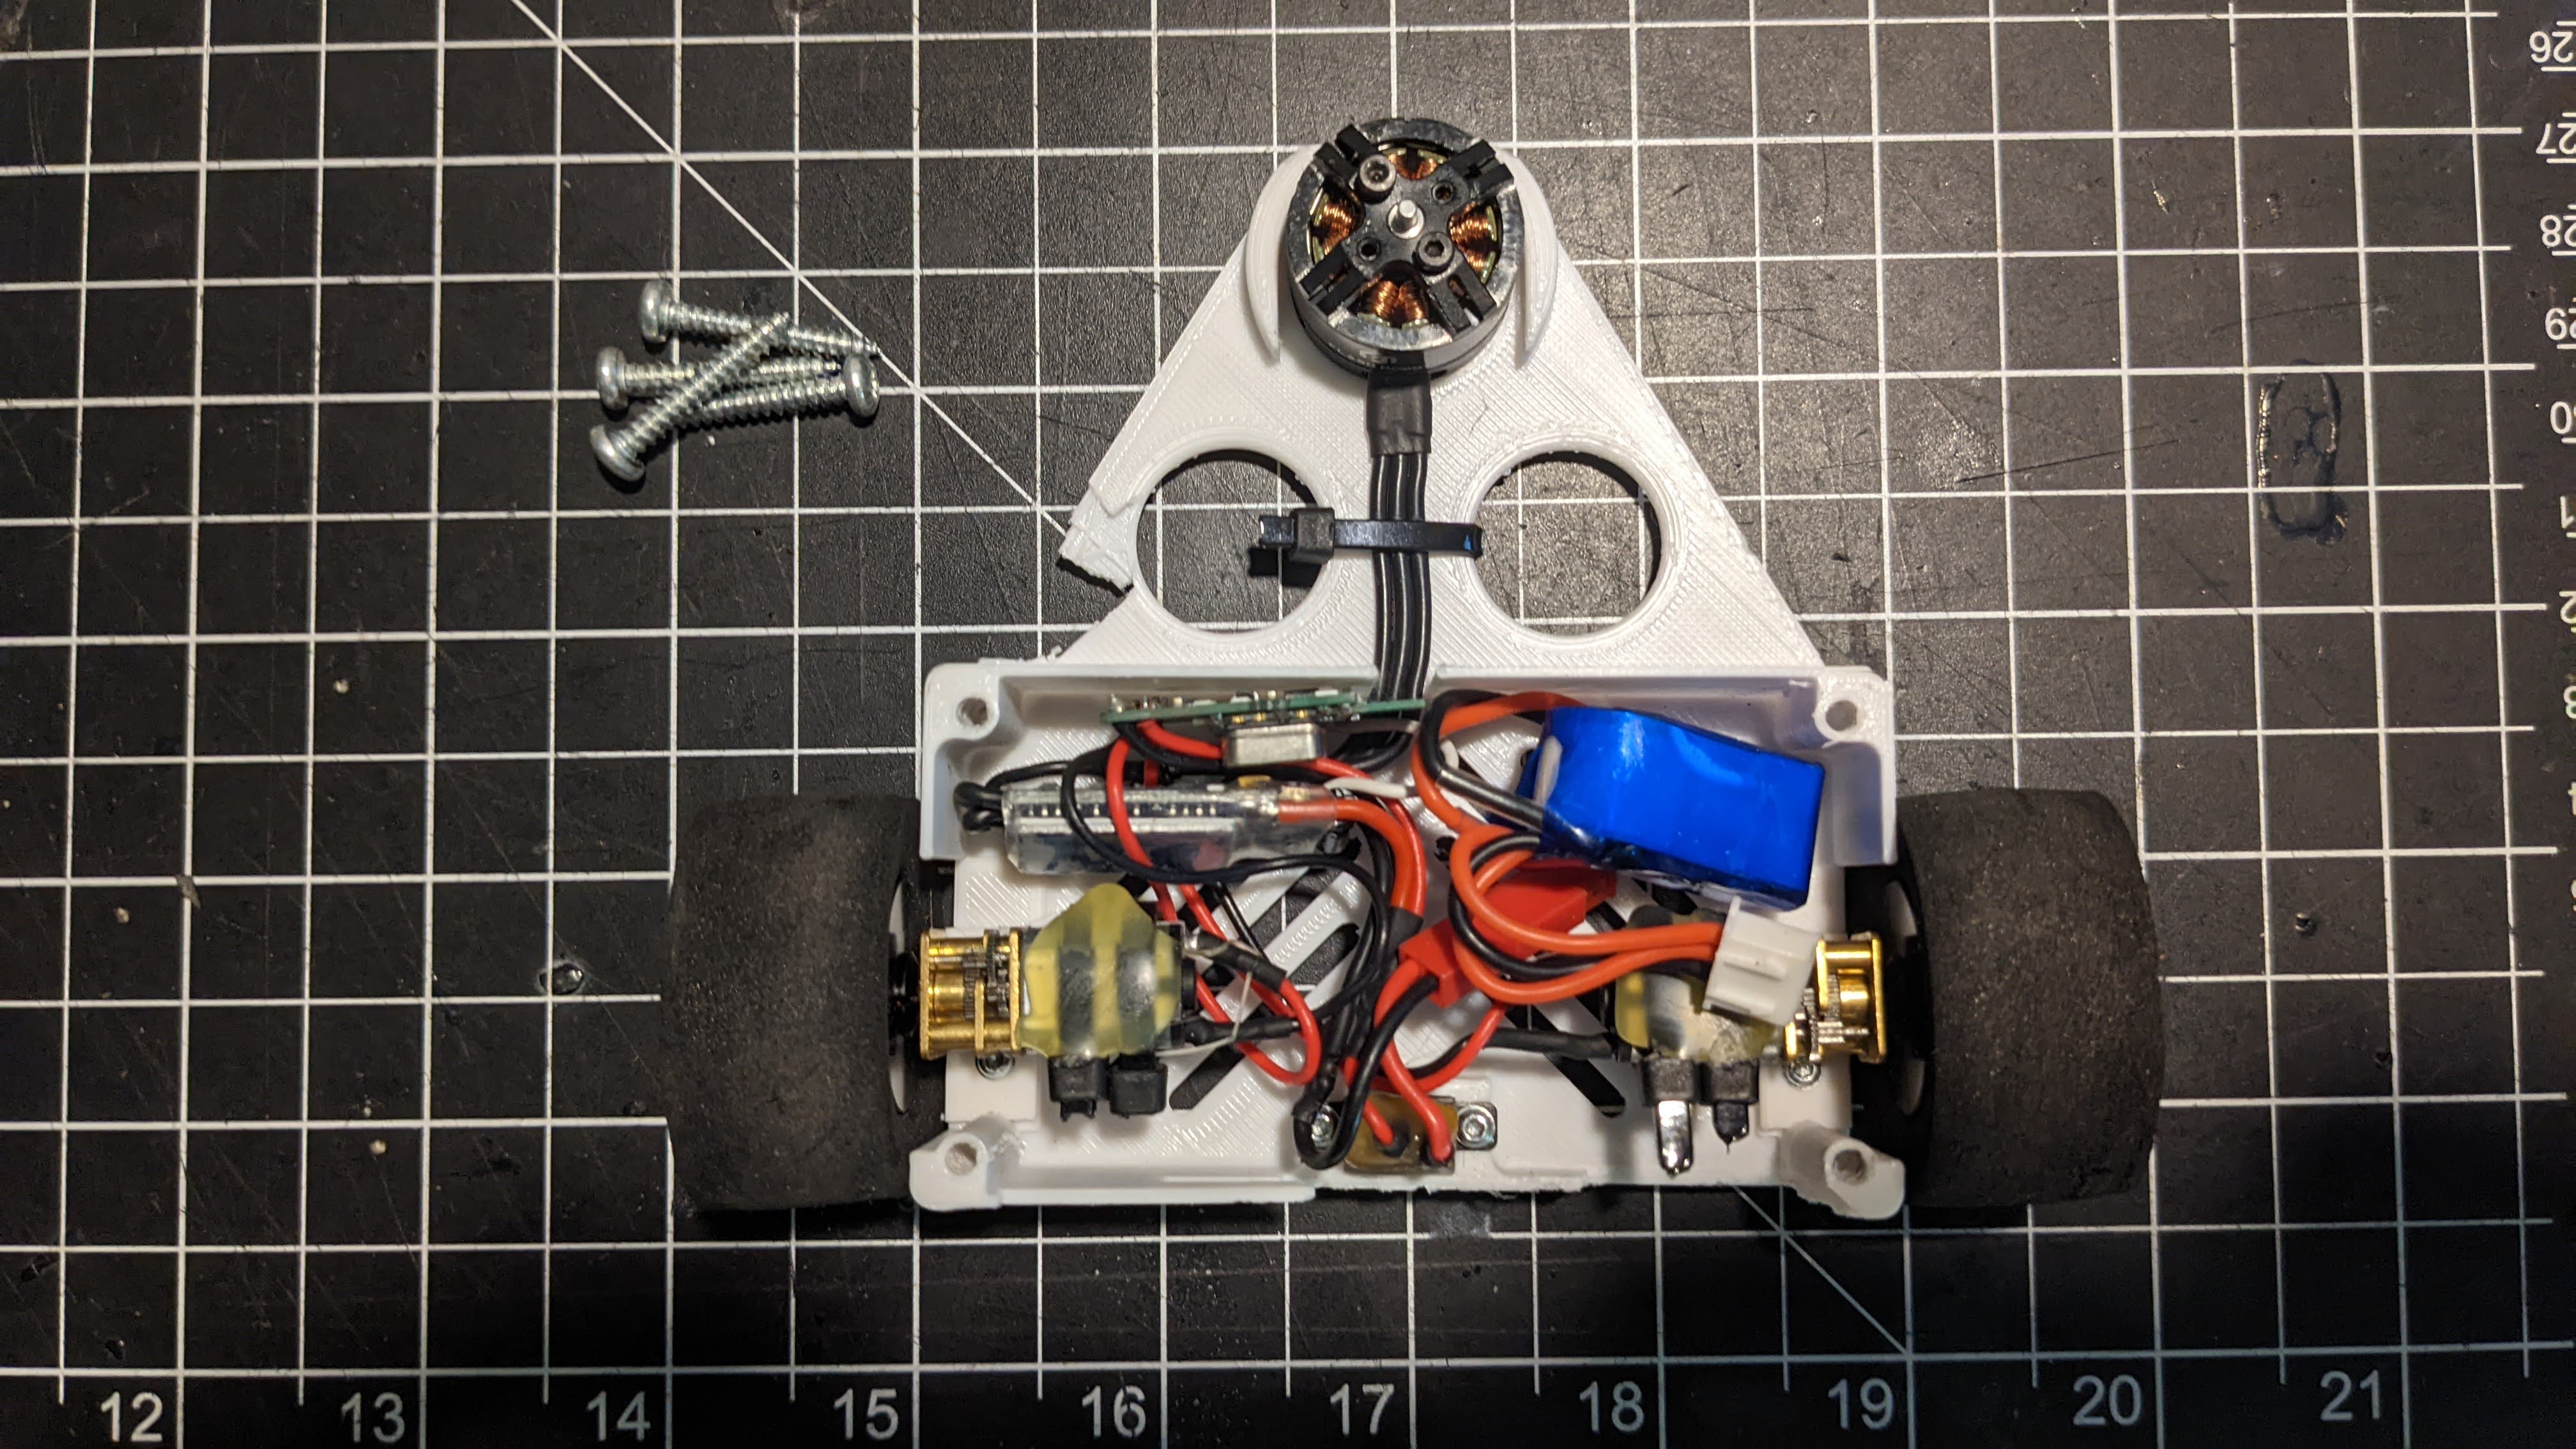
The weapon motor mounts up front here. I press the motor onto the plastic studs which holds it in place surprisingly well, and then I usually use two screws to hold it down. In theory, the studs protect the screws by taking most of the sheer force in a hit. I don't know how well that works, but I've also never sheered one of those screws so I'm not inclined to experiment with it.
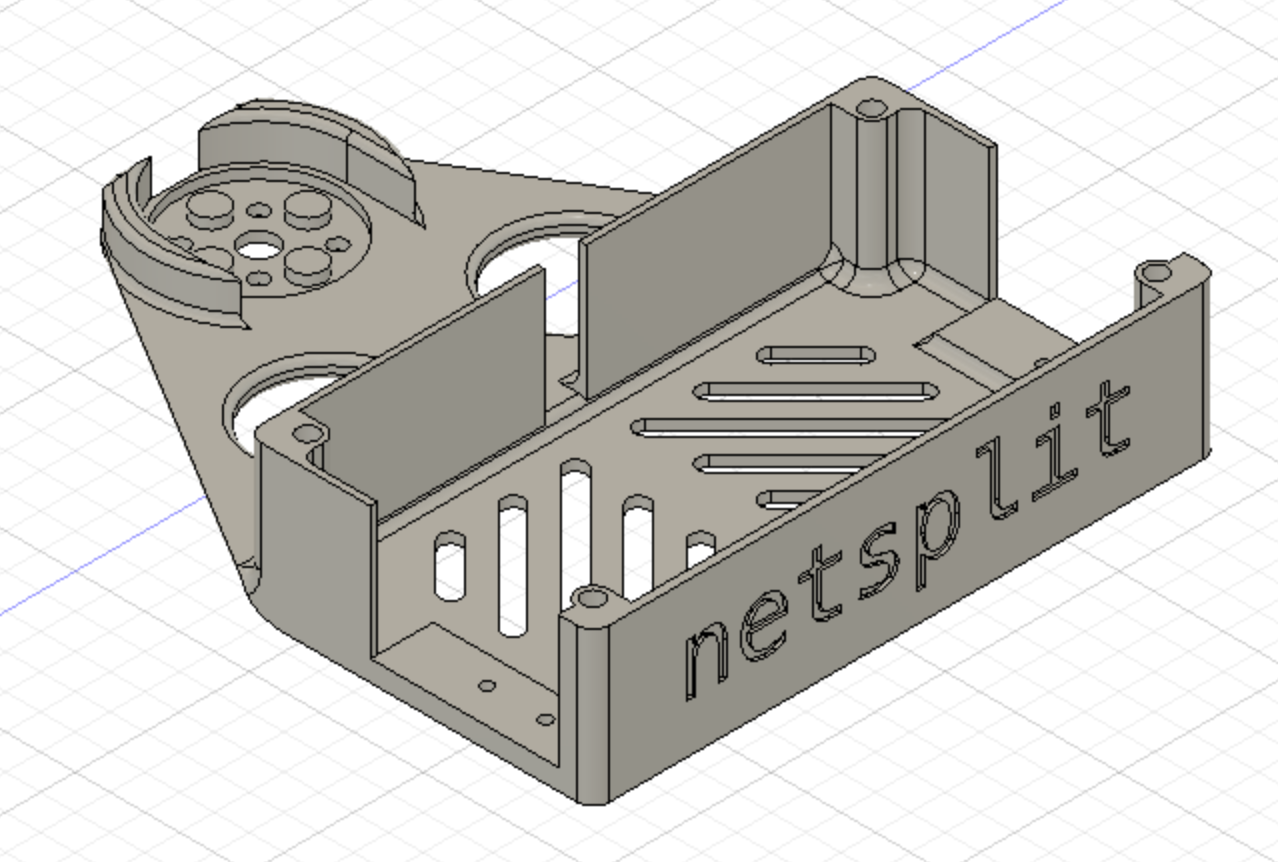
While the can of the motor can take hits quite well, a few of my regular competitors hit low enough to bend the motor base in a way that it interferes with the can and prevents it from spinning. An easy fix in the pits, but losing my weapon usually means losing the fight. The "popped collar" around it is designed to let me survive a couple more of those kinds of hits by crushing and then falling off. So far it's been pretty successful, but lately I've been contemplating something more ramp-like that could deflect opponents weapons up into mine, but it'd have to be metal which reduces cheapness and disposability.
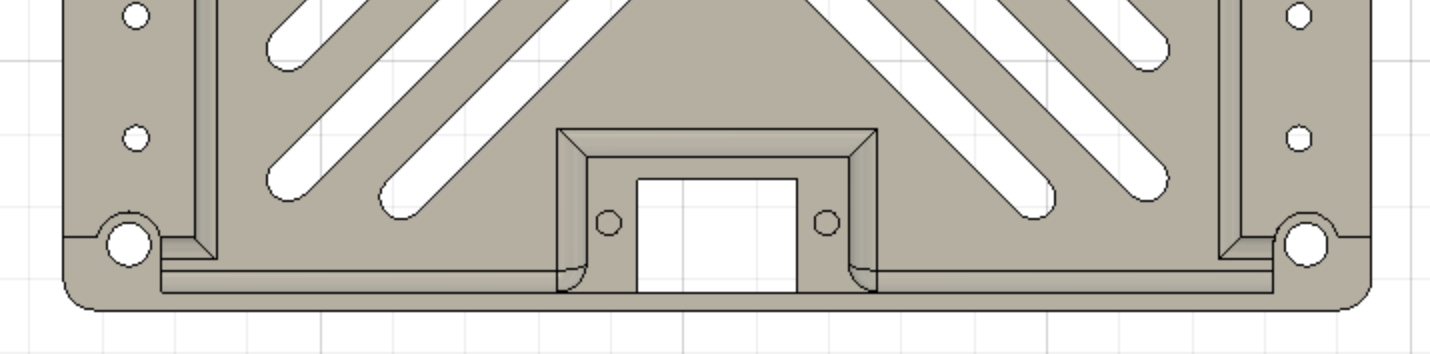
At the rear I have a recessed mounting for a slide switch. The switch is fully encased in the chassis and requires a tool to reach in and flip it. I did a ton of testing on these switches before my first competition because switches seem to be an uncommon choice here in the US. I wasn't about to shell out $8 for a fingertech switch, nor was I willing to fiddle the battery connector in the battlebox. I built a whole test rig to see if I could get any switches to turn off using 1000s of impacts and never could, it's also never failed in competition, so I'm pro-switch now.
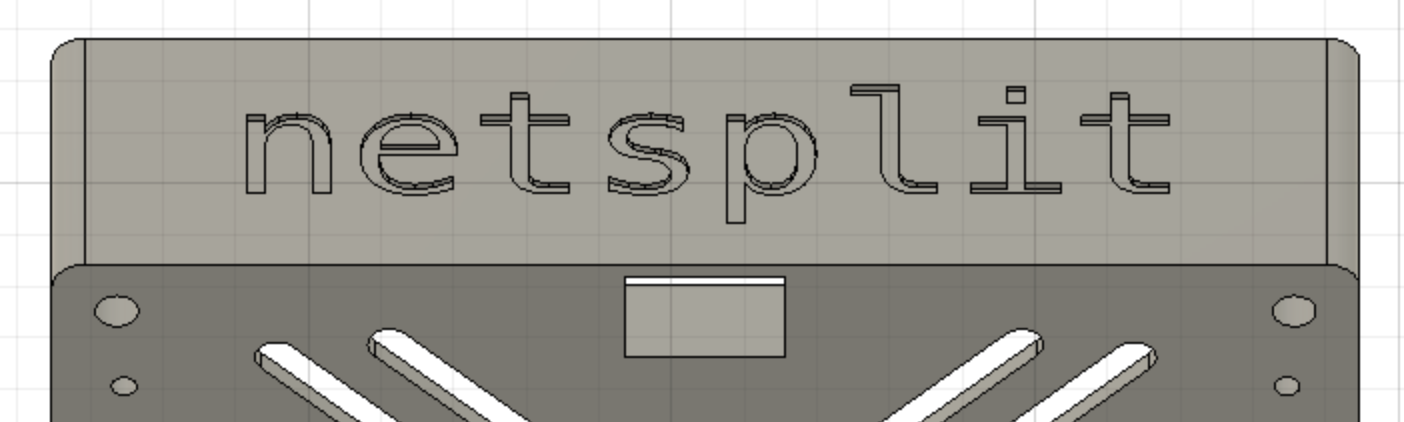
And finally right out the back is the nameplate. Something I learned at my first competition is having the name somewhere on the robot helps the organizers a lot. With the vents on the top and bottom the only remaining flat space was the rear. I'm not super happy with it right now because Netsplit has no preferred right-way-up, so I often start a battle with the nameplate upside down.
Drive
lorem ipsum